

|
0
|
|
|
0
100
|
0
100
Canon EF 50mm f/1.8 STM
Canon EOS 6D Mark II
Basic Terms
The three values aperture, exposure time and ISO control how much light falls onto the camera sensor.The opening of the aperture regulates how much light enters the sensor; the more open, the more light enters. A similar behaviour occurs with the shutter speed; if the speed is set to a lower value, the light has less time to fall on the sensor. A button is assigned to some sections that automatically configures the simulator and shows how the described phenomenon could look like in an actual picture. In addition, it shows the values that are being used.
Automatic Mode
The automatic mode of the camera tries to produce the best possible exposed image with the three controls aperture, exposure time and ISO. Since the camera has no information about the environment or the desired behaviour, the result may differ from the photographers intention.Noise due to high ISO value
Such an example is shown here. All of the simulator images were taken with a tripod. The camera, not having this information, has chosen a fast shutter speed of 1/250sReducing the ISO value by using a tripod
For handheld camera usage, a fast shutter speed is necessary to prevent motion blur caused by camera shake. Since in the example the camera is mounted on a tripod, the motion blur can be neglected. As a result the shutter speed can be set to a high value and still produce a sharp image. To counteract the high ISO value, a shutter speed of 1/2sValue shift: Single value
The resulting ISO can be derived when looking at the following calculation:If one value is halved, another must be doubled in order to produce an image with the same brightness!
To reduce the ISO value from 6400
6400
However, if only the ISO value is adjusted, the image will be too dark.
Value shift: Two values at the same time
To maintain the brightness of an image, two values must always be adjusted simultaneously. In the example above, when reducing the ISO value from 64001/125s
The final result has the same brightness as in the Noise due to high ISO value example, but is of higher quality and has less noise.
Controlling background blur - The AV mode
The Aperture Priority mode is also referred to as A-mode by other manufacturers.When taking photos of still subjects such as people (portraits), food or the like, it can be time consuming to adjust all the settings every time the light changes. In this situation the AV mode can be used. Here, only the aperture (and possibly the ISO value) is set, while the rest of the settings are automatically determined by the camera. To obtain the same amount of background blur for a series of portrait photos, the aperture setting only needs to be entered once in this mode. This setting is then retained for different lighting conditions, while the shutter speed adjusts accordingly.
Open aperture - Strong background blur
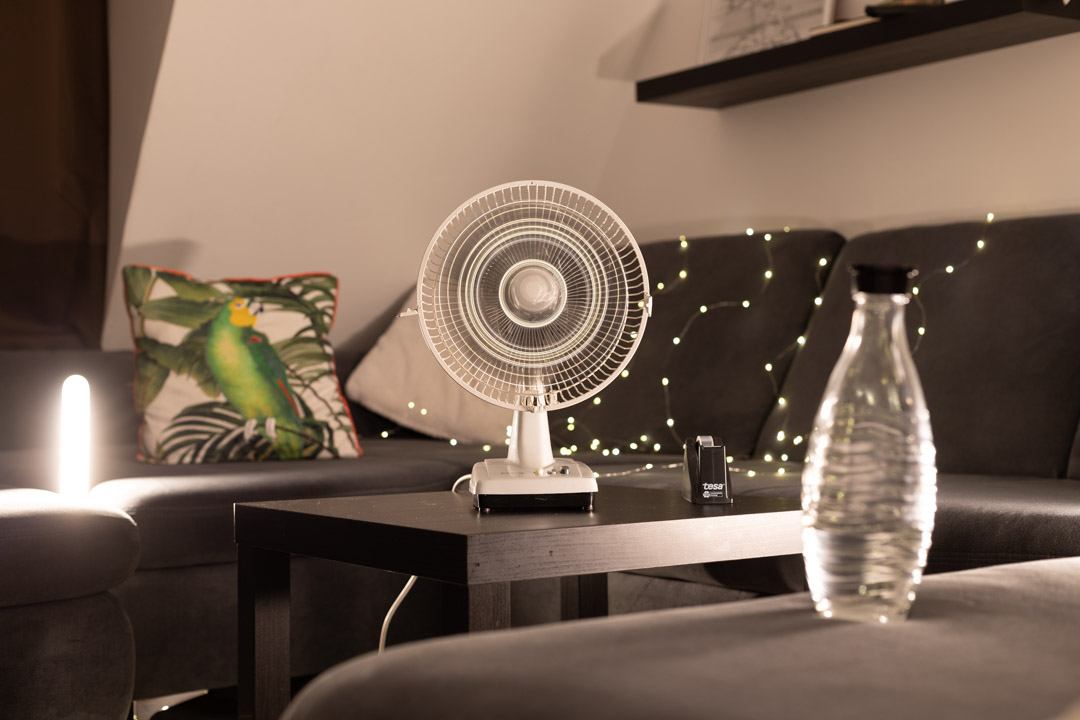
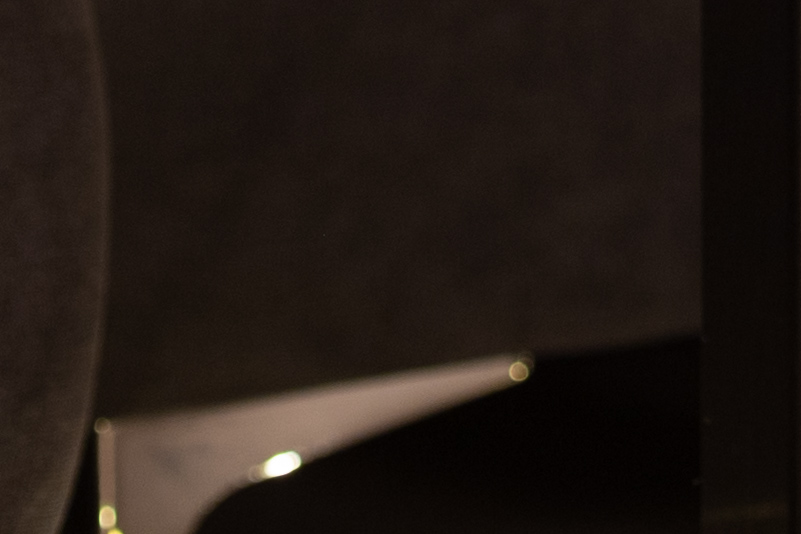
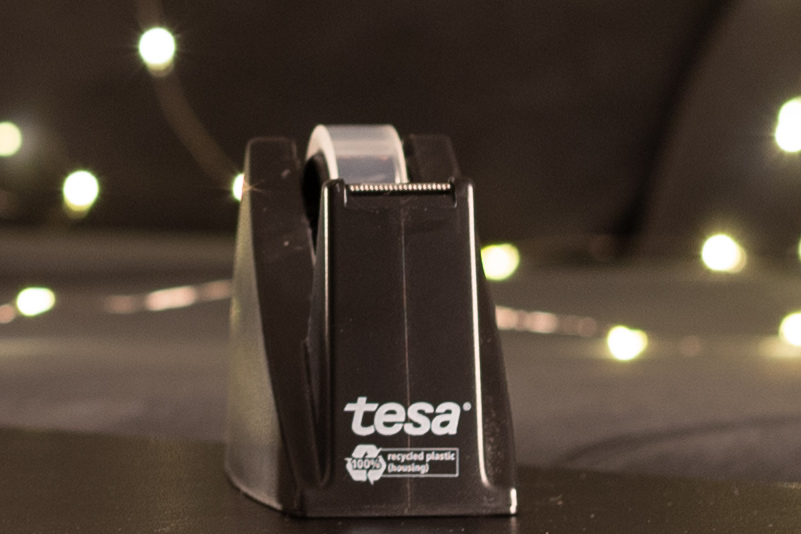
The aperture controls not only how much light falls onto the sensor, but also the width of the focal plane. This means that when the aperture is wide open, the background and foreground become blurred. This can be an advantage, but it can also lead to problems if, for example, a group of people is being photographed.The example shows that everything on the focus plane is sharp (fan, scotch tape). The background (lights) and foreground (bottle) become blurred.
Note: This blurring is also called bokeh.
Closed aperture - Weak background blur
Background blur is often undesirable in landscape, group or architectural photography. In these scenarios, the focal plane (the part of the image that is in focus) should capture the whole subject and not just parts of it. Here it is important to know - the more the aperture is closed, the larger the focal plane. In this extreme example it can be seen how, with an aperture of 22Extra Tip: Create more background blur
Hint: Large ƒ-values mean a closed aperture and vice versa.If the aperture is already wide open, or a lens is used that only allows a smaller aperture opening (common for inexpensive-, or kit-lenses), there are two other ways to increase background blur: Reduce the distance between the camera and the subject, or increase the distance between the subject and the background.
Extra Tip: Light calculation for aperture values
In the previous example calculation (see Value Shift) it was shown that the values always double or halve. For the aperture, a different scale is used (reasons for this are beyond the scope of this project) - nevertheless, the incident light doubles/halves at each step. The sequence of common aperture opening values is: 1Extra Tip: No sharp images at extreme values
Lenses often have problems producing sharp images when the aperture is completely open. The same is true (although for different reasons) with the aperture almost fully closed. This video shows that darkness and softness are present especially in the corners of the image at 1.8Controlling Motion Blur - The TV Mode
The aperture priority mode is also referred to as T or S mode by other manufacturers.Setting the shutter speed controls how long the sensor is allowed to take in light. If set incorrectly, this can cause images to look blurred or "shaky". Control over this value is especially important when photographing moving subjects such as animals, children or athletes. This is where the TV mode helps: after entering the shutter speed, the aperture opens and closes automatically to let the right amount of light fall onto the sensor.
"Normal" Exposure Time
To shoot non-blurry images handheld, there is a rule of thumb: the shutter speed should always be lower than 1/focal length in seconds. So if a 50mm lens is used, the shutter speed should be 1/50sSmaller here means that the number below the fraction bar becomes larger!
However, since modern cameras can capture a lot of detail, some photographers have taken to doubling the value below the fraction bar. With a 200mm lens, this then results in a shutter speed of at most 1/400s
Short Exposure Time
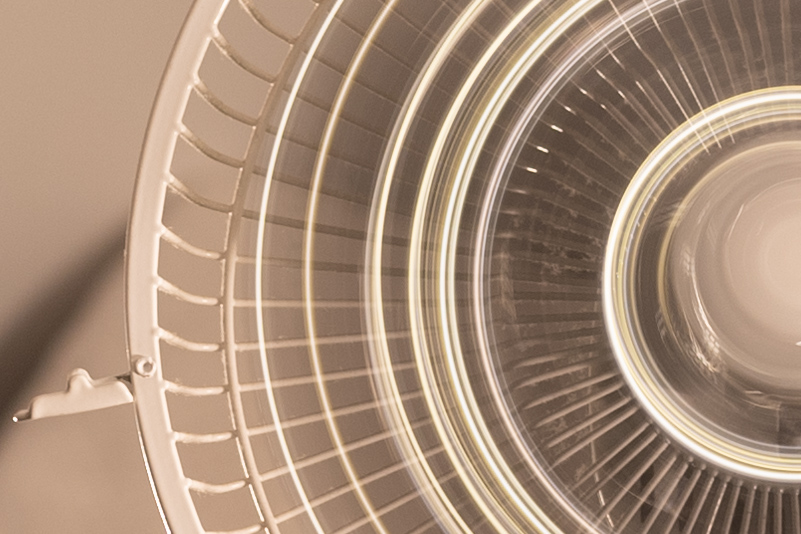
Especially in sports and wildlife photography it is important to choose the right shutter speed - which is typically very fast in both cases. Using the fan as an example, a shutter speed of 1/4000sLong Exposure Time
If a tripod is available, interesting effects can be created with extremely long shutter speeds. For example, if a waterfall or lake is exposed for several seconds, the water appears soft and smooth. However, this should only be attempted when there is little available light (for example at dusk), as during the day the image is very quickly overexposed. So-called ND filters can be used against this phenomenon. It is also a good way to capture still scenes at night, despite the lack of light. Since the fan in this example is moving very quickly, a slight increase in the shutter speed is sufficient so that the rotor blades and the string of lights attached to them become completely blurred.Extra Tip: Freezing is not always the only way
Some photos can lose their impact if moving subjects are shot at too fast a shutter speed. For example, a "moving train" at 1/4000sExtra Tip: Displaying Movement
Another way to show movement in an image is to have a blurred background but still a sharp subject. To accomplish this, the camera should be set to a moderate shutter speed (for moving trains, about 1/250sSummary
This section summarises the concepts learned so far and gives an overview of different camera recommendations. In addition to this, considerations are made on how to deal with any problems that arise.Manual Mode vs. AV/TV
If you're new to photography looking for tips and tricks on the internet, on YouTube and in blog posts you'll often hear: "Use manual mode!". In manual mode, all the values discussed can be set to capture each image as desired. For beginners, however, this is often more of a hassle, as changing the values takes time and nerves and you have to think about the consequences of changing each value every time. Therefore, here is a personal recommendation for beginners: When photographing still subjects, the AV mode should be used. Pick a wide open aperture for artistic background blur. For moving subjects the TV mode should be used. If the automatically determined settings do not produce the desired result, it is still possible to switch to manual mode. Automatic mode should generally be avoided.Compromises
Now, anyone who has understood and memorised the meaning of the values aperture, shutter speed and ISO may at some point find themselves in a situation where the desired values result in an image that is too dark. Example: Indoor group photoSince a group is being photographed, the focus plane must not be too small. So an aperture of about 8
The resulting image: Almost completely black!
Due to the often dim lighting and small windows, there is not much light available. As a photographer, compromises must therefore be made:
- Increasing the aperture to 4
 and instrumenting a flatter placement of the subjects?
 - Decreasing the shutter speed and telling the subjects to hold still?
- Increasing the ISO value and tolerating the resulting noise?
- Buying a flash or other portable light sources?
Expensive camera = Good picture quality
Reviews on the internet or a visit to a photography store may give the impression that you have to spend thousands of euros/dollars to take beautiful pictures with professional camera equipment. However, that is not necessarily true.A good photographer can take great photos even with a modern mobile phone camera; a beginner, on the other hand, will not be able to create much more than "snapshots" even with the most expensive equipment.
Still, high-end equipment has its advantages:
- Faster autofocus
- Sharper images
- Weatherproof
- More frames per second
- etc.
If you don't have to wait for the rain shower to pass, you save time. If you shoot 20 frames per second, you might catch passing birds on the first try. With 3 frames per second, this may take several attempts. A modern autofocus on a new camera can prevent repeating the same image due to missed focus. Older camera models, on the other hand, may require several manual readjustments in this context. In almost all of these cases it is possible to get the same image, but the effort can be considerably greater with beginner's equipment. However, there are also very good camera-lens combos that do not cost much and can still achieve great results. Like, for example, a used (full-frame) Canon EOS 6D camera (about €/$400 on eBay) and a new Canon EF 50mm 1.8 STM lens (€/$70-100). Of course, there are much cheaper cameras available that don't have a full-frame sensor.